
Creating your own lovely marble pattern is made easy with a few steps on photoshop. This sleek and elegant design can be used as a background or pattern in many creations, and the ability to create your own gives more artistic choice in the look and colour of the marble!
Such a pattern has been growing immensely in popularity, and many are drawn to the clean look of the design.
You could always do it by hand such as below, which also gives a beautiful result, but is less usable in a digital format.
So lets explore how to create a unique marble as a digital image….
Steps

- Create a new photoshop document, choosing an artboard size of your choice. Go filter –> render –> difference clouds.

2. To add more colour contrast, go image –> adjustments –> equalize.
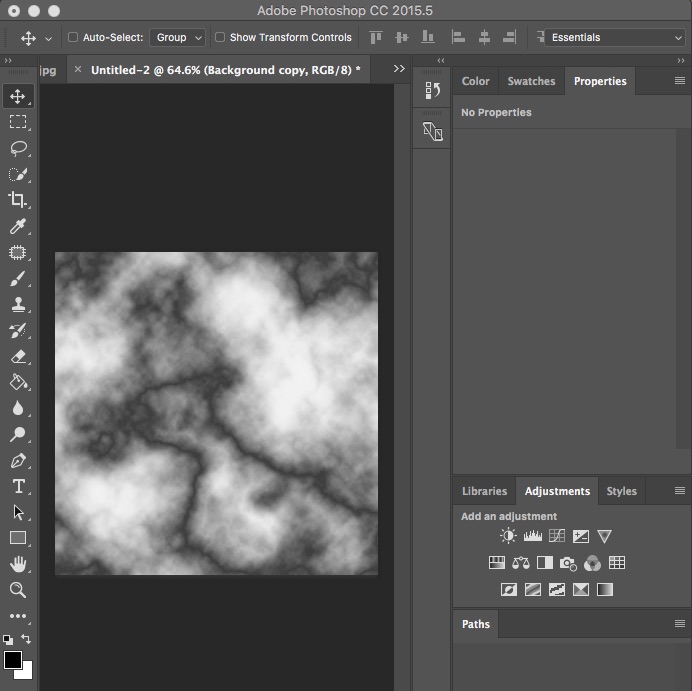
3. To make the veins of the marble thinner, go image –> adjustments –> levels and move the bottom left dial to the right until you are pleased.

4. Duplicate the layer. On the new layer, set the blending mode under layer style to screen. This lightens the marble! And Ta Da- your own beautiful marble pattern.
Visit HERE to learn how to add colour to your marble design continuing the steps we just followed.
Now your marble is finished, use it to complete many creative documents such as your own beautiful business card…
